

How to Choose and Use a Walker Safely
There are many reasons you might need a walker mobility aid. Among those might include fear of falling from weakness in one or both legs; recovery from recent leg, knee or hip surgery or fractures; shortness of breath; inability to carry items while walking; weight related stability; fatigue issues from illness or treatment recovery; lack of general balance; or general mobility issues. Whether you have one of the aforementioned issues, need assistance getting around the home or running errands out in public, a walker could help solve your mobility issue(s). In this article you will learn how to choose and use a walker safely.
How Do I Determine a Walker is the Right Tool for My Needs?
 Some people may need one or two canes to help with ambulation. Canes are good for those who have relative stability and mobility but need a small amount of support to keep their balance, confidence and gait. Canes may be a good solution to assist those who have mild arthritis and require occasional support as needed.
People who have very weak legs or knees, an amputation, severe chronic breathing problems, are required to be on constant oxygen and carry a tank, suffer from crippling arthritic or neurological problems, or require one or both legs to be elevated may not be suitable for a walker. A wheelchair (manual or electronic) may be a better solution.
If your mobility needs fall somewhere between a cane and a wheelchair then a walker may be a great resource for you. Next we will look at the different kind of walkers and deciding which one might be a good solution for you.
As with all medical equipment and aids you should check with your doctor or therapist for which walker works best for your needs. How to use a walker properly instructions are outlined below. However, you should always check with your therapist should you require additional needs in the use of your new walker, such as tackling stairs with your mobility solution.
What Kind of Walker Do You Need?
Walkers can be your new best friend, giving you back the mobility you lost to disease, surgery or simply the aging process. But how can you tell which one you need? There are several types of walkers:
- frame walkers with no wheels (collapsible option)
- frame walkers with 2 wheels (collapsible option)
- walkers with wheels, seats, and brakes (rollators) (collapsible option)
 A frame walker with no wheels is the basic form of a walker and the cheapest. You will need to have the strength to lift the walker and move it forward to walk with it. Some people replace the two back tips with glides or slides to make it easier to move the walker. This type of walker is for the budget restricted person or perhaps those only needing a walker for a limited period of time while they recover.
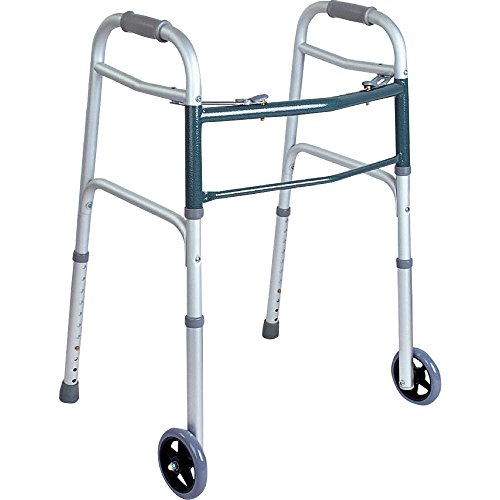
A frame walker with two wheels makes it easier to move the walker forward and pivot with minimal strength. Walkers with two wheels will still require someone to lift the back tipped ends before rolling the walker forward. Some people replace the two back tips with glides or slides to make it easier to move the walker. These walkers come with trigger releases to help brake the walker so it does not get away from someone causing them to fall and to lock the walker when not actively being used.
Both tipped and wheeled frame walkers can come in a collapsible version making it easier to transport and store. They also come in bariatric versions that can support people up to 600 pounds. You can find accessories to enhance the use of your walker to include; trays for eating and work, wheels to convert your tipped walker, pouches, baskets, organizers, holders and more to securely transport items you need to move with you.
All wheel walkers, commonly known as rollators, are a great mobility solution for those who generally have good stability and mobility but need to rest more frequently than others while walking distances. These can be more expensive than regular frame walkers but offer enhancements such as ease of use with four rolling wheels, a bench for resting that may include storage, hand brakes for control and front baskets to store your personal items while out and about. They also come in bariatric sizes to accommodate the larger sized person. Items to consider when purchasing a rollator include:
 rollator weight – you need to be able to place and remove the rollator from your vehicle. They could range from 10 to 30 pounds in weight.
- rollator height – meaning the height from the ground to your hands or hips. Can the rollator be adjusted to your correct height (could be too low or high)? This is very important for maintaining good posture while walking.
- seat height – heights are measured from the ground to the top of the seat. Do you sit at 16″, 18″, 20″ or 22″ from the ground?
- seat type – some seats are made of hard plastic while others are nicely padded for your comfort.
- wheel size – smaller wheels are 5″ in size and go up to 10″ in size, the size needed depends on where you plan to use your rollator. Tougher pavement, gravel, grass and uneven surfaces require a larger wheel to absorb shock and provide you a smoother movement.
- weight capacity – lighter rollators usually accommodate weights up to about 300 pounds. You can find many makes and models to fit your needs and can accommodate weights from 250 up to 600 pounds. Never exceed the manufacturer’s specified weight limit as it will void your warranty and you will risk injury from breakage.
No matter which walker you and your therapist choose you need to make sure it has been well adjusted for your height to be effective and help avoid falls. Frame walkers usually have push pins that you can press and adjust each leg to your height. The top of the frame should be aligned with your hips or wrists and your elbows are slightly bent when you grip the handles. Rollator walkers too have push pin adjustments and the handles should meet you at wrist level height.
Basics of Using a Frame Walker
Frame Walkers – Sitting to Standing
- Place the walker, open side towards you, directly in front of you.
- Make sure all tips or wheels are firmly touching the ground.
- DO NOT use the walker to pull yourself up as it may tip over! Use the chair arms to push yourself up. If not available ask someone to assist you to stand.
- Grab both handles of the walker and step into the center of the frame.
- Make sure you feel steady and strong to begin walking.
- Optional: place any items you plan to carry in a front basket, if available, before starting to walk.
Walking with Your Frame Walker
- Tipped walkers – lift your walker a few inches off the floor and move an arm’s length in front of you. Two wheel walkers – lift the back end of the walker and push the front of the walker an arm’s length in front of you.
- Make sure all tips or wheels of your walker are firmly touching the ground before you take a step.
- Step forward with your bad or weaker leg.
- Follow by stepping forward with your good or stronger leg.
Repeat these steps to continue moving to your desired location. Go slow, maintain good posture and use your handles to lean on evenly for support. Try to keep your eyes looking straight ahead instead of looking down at your feet. You need to see where you are going.
Frame Walkers – Standing to Sitting
 Carefully back yourself up to a chair, bed, toilet or bath transfer bench until you feel the seat at the back of your legs.
- Make sure your frame or wheeled walker wheels are all firmly touching the ground.
- Reach back with your stronger hand to grab a handrail, grab bar or armrest behind you. (If you cannot do this yourself ask someone for assistance to avoid falling.)
- Use your stronger leg to move close to the seat and slowly sit down.
- Move your weaker leg into position and adjust yourself in the seat.
Frame Walkers – Stairs and Curbs
- Approach the stairs or curb straight on.
- Place your frame walker on the step or curb in front of you if ascending and on the step or curb below you for descending.
- Make sure all four tips or wheels are firmly touching the stair or ground.
- Step up with your stronger leg first, place your weight on the walker frame and follow by bringing your weaker leg up to the stair or curb. Descending a stair or curb is reversed by placing your weaker leg first, putting your weight on the walker and then bringing your stronger leg down next to your weaker leg.
Basics of Using a Rollator
Rollator – Sitting to Standing
- Engage the brakes by flipping both handle brake levers downward. (Ensure the rollator cannot move.)
- Move to the edge of your seat.
- Keep your feet in front of you close to the chair or seat.
- Use both your hands on the arms of the chair and stand. (Do not lean on the rollator as it may tip over.)
- Walk into the rollator and grasp both handles.
- Make sure you are balanced and your legs and arms feel ready to support you.
- Disengage the brakes by flipping both brake levers upward.
Walking With Your Rollator
 Place your rollator directly in front of you.
- Gently roll the rollator forward as you naturally walk behind it. Use strides that match your normal gait. Shorten the width of your steps if you have trouble keeping up with the rollator or are having balance or breathing issues.
- Turn your rollator naturally the way you would turn. Don’t turn the rollator first and then try to turn towards it afterwards. Your movements should be natural. The rollator wheels will pivot in any direction you need to turn.
- Stop and rest on the attached bench as needed.
Rollators – Standing to Sitting
- Navigate to your seating and stand with your back to it. Slowly back towards the seating until the back of your legs touch the seating.
- Move the rollator forward a little bit so you have adequate room for your legs to sit.
- Engage the brakes.
- Reach behind you with one hand for a handrail, grab bar or arm of a chair while keeping the other hand on the rollator. (Be careful not to tip the rollator over.)
- Lower yourself into the seat using your legs for support.
- Use your other hand to lower yourself into the seating. (If you cannot perform these tasks yourself ask someone for assistance.)
Safety Tips
 When walking, start with your weaker leg. If you had surgery, this is the leg you had surgery on.
- When going up a step or curb, start with your stronger leg. When going down a step or curb, start with the weaker leg: “Up with the good, down with the bad.”
- Keep space between you and your walker, and keep your toes inside your walker. Stepping too close to the front or tips or wheels may make you lose your balance.
- Make changes around your house to prevent falls:
- Make sure any loose rugs, rug corners that stick up, or cords are secured to the ground so you do not trip or get tangled in them.
- Remove clutter and keep your floors clean and dry.
Wear shoes or slippers with rubber or other non-skid soles. DO NOT wear shoes with heels or leather soles. - Check the tips and wheels of your walker daily and replace them if they are worn. You can get replacements here or local drug store.
- Attach a small bag or basket to your walker to hold small items so that you can keep both hands on your walker.
- DO NOT try to use stairs and escalators unless a physical therapist has trained you how to use them with your walker. (1)