
As we saw in part I and part II of our look at bathroom bathing design, the smallest room in your home could pose the biggest risk to you and your loved ones. Let’s complete our look at design considerations in Bathroom Bathing Design: 10 Things to Consider-Part III.
#7 – Storage Space for Products
Everyone will need a spot to safely store their soap, body wash, shampoo and conditioner. If you are building or remodeling your tub or shower area a great solution would be to use a cutout in your wall for a niche or well to store your bathing products. They are easy to create and wide enough to store all your products. Just remember to slope the bottom of the well slightly outward so any water will run out and not pool in the well area.
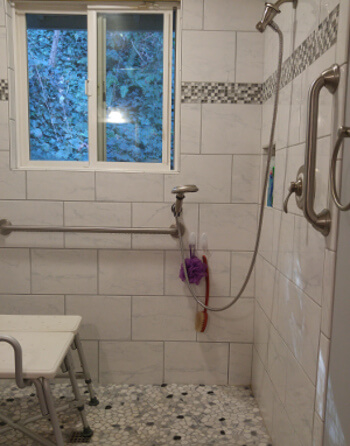
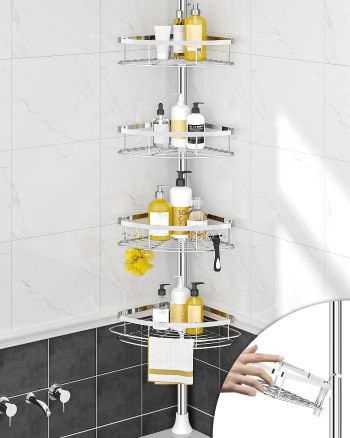
There are other options for storage of bathing products. Just make sure they are safely tucked away to prevent tripping and are within arm’s length to be accessible to the bather. You could use a tension mounted pole with trays. Some bath chairs or benches come with storage built-in to the seat. There are also grab bar solutions with built-in caddy storage. Whatever solution you use please be sure it does not create a tripping hazard, is easy to reach, easy to clean or manage, and is rustproof.
#8 – Access Barriers
It is important to consider how someone will need to enter and exit a bathing area in order to know what kind of access to provide. People with limited mobility may not need the same level of access as those in wheelchairs. Your most important question will be can you step over a barrier or lip of your shower edge to enter and exit or do you need to be able to roll into the shower?
If you’re funding your own remodel then you do not need to follow ADA (Americans with Disabilities Act), which is required for all commercial bathroom designs or government agencies funding your project, but it is highly recommended to hire a contractor or become knowledgeable yourself on ADA guidelines to build the best “accessible” bathroom possible. Here are three shower access types to consider that can be both ADA and accessible.
Shower Solutions
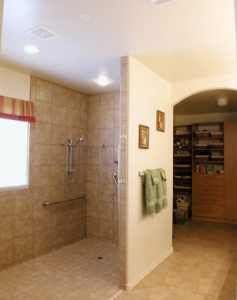
- Barrier-free all-access or “wet room” bathroom – the entire bathroom floor and walls are waterproof making it easy for impaired people to move from toilet to shower to vanity without stepping over any thresholds. This is great for those in wheelchairs or with severe mobility to make full use of their bathroom facilities. Usually the whole bathroom floor needs to be gently sloped towards the drain to avoid water pooling in any part of the room. (This might only be an option for a new bathroom build or total remodel as it is the most expensive to implement.)
- Barrier-free shower – there is a very low (1/2 inch) or no barrier to entering and exiting the shower. This is a great solution for wheelchair users, those needing to perform transfers from wheelchair to a seat and those with very limited mobility or stability.
- Accessible shower – there will be a low threshold to step over when entering and exiting the shower area. This could be 1/2 to six inches in height, depending on how high the client could safely lift and swing their legs.
- Wheelchair Accessible Portable Shower Stall – depending on the space in your bathroom, the cost of a remodel and the abilities of the person in the wheelchair a portable shower stall may an alternative to showering in a traditional setting.
Bathtub Solutions
If you do not want to go through the money and renovation process to replace a tub with a shower, there are still some things you can do to provide a safe bathing environment for your loved one.
- Bath transfer benches are a great solution for those who cannot climb over a tub wall. They can sit outside the tub, lift one leg over at a time and scoot over the bench into the tub for washing. We have several choices in both standard and bariatric sizes to help you safely bathe in your own tub.
- There are kits available to cut a doorway that swings out in the middle of your outer tub wall that will give you a walk-in tub. The door seals so there is no leakage onto your floor. You can use a bath chair, storage caddy, and grab bars to provide a safe bathing area. I would recommend a professional contractor or company that specializes in this product to do the installation just to avoid any leakage issues.
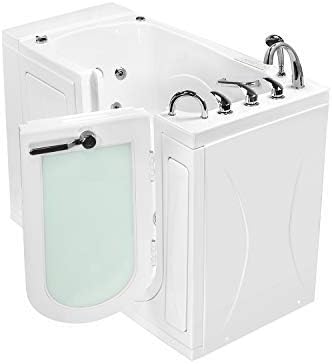
- You could replace your tub with a walk-in tub, similar to that depicted below, that could use the same footprint as your existing tub and not sacrifice bathroom space. These are a great solution with a low walk-in footprint and come with lots of options for bathing such as, pulsating jet for a hydro massage, wide seats, heated water for a spa feeling, retractable shower-head and padded foot rests for comfort. This is a very popular option with seniors.
#9 – Ventilation and Lighting
When you are designing your bathroom remodel, especially the bathing area, do not forget to include adequate ventilation (the cycling of steam and excess heat with fresh air) and lighting. These two items, while seemingly insignificant to other items of consideration in a bath remodel, can make a bathing experience unsafe too.
Ventilation
Ceiling exhaust fans are essential to help air move in your bathroom, especially during winter months when windows cannot be opened to cycle fresh air. They are also vital in helping mold and mildew from forming by droplets of water from steam clinging to your walls, ceilings, windows and attic spaces. Here are some things to consider when investing in an exhaust fan:
- Sizing – most fans are sized by the total square of your bathroom space. Is your bathroom 50 square feet, 100 square feet, 200 square feet or more? (square footage is determined by measuring the length and wide of your space and multiplying those two numbers together)
- Air flow capacity – air flow in the fan is measured in cubic feet per minute, or CFM. According to the Home Ventilating Institute you should have 1 CFM for every square foot of your bathroom for bathrooms between 50 and 100 square feet. Under 50 square feet should just use a 50 CFM rated exhaust fan. For bathrooms larger than 100 square feet use a compilation of each fixture as follows: Toilet 50 CFM, Shower 50 CFM, Bathtub 50 CFM and Jetted tub 100 CFM. (Our bathroom is 150 square feet with 100 CFM of fixtures. We chose a Nutone 110 CFM .8 Sone with nightlight model, which is HVI certified, for our shower area.)
- Noise – According to HVI “Bathroom fan sound levels are measured in sones: 4.0 sones is the sound of standard television operation; 3.0 sones is typical office noise; 1.0 sones is the sound of a refrigerator; and 0.5 sones is the sound of rustling leaves. For quiet bathroom ventilation the fan should be rated at 1.0 sones or less.” (1)
- Venting – venting is vital to drawing out the excess moisture and properly dispelling it from your house. Make sure your contractor is knowledgeable on running the venting tube into one of your outside vents to move the moisture up and away from your house. Otherwise, you will be venting into your attic space which will start molding your joists, roof underside and items stored in your attic!
- Timer – most building codes do not require a timer on your exhaust fan but you may want to consider buying one that has a timer. The timing cycle is enough to perform its proper function in removing moisture, mold and particulates from your bathroom. A timer allows the unit to automatically shut off when complete saving you energy and not forcing you to remember to turn it off after a period of time.
- Other considerations – exhaust fans come in various colors, sizes and amenities to fit your needs and decor. You may want to consider one with a heating element, a light, a night light, a timer or a humidistat for automatic operation. (We decided to combine a light that floods the shower area with ample light, a night light for night time bathroom navigation and a timer in case we forget to go back and turn off the unit. We couldn’t be happier with that combination that fits our bathroom needs.)
Lighting
Being able to see where you are walking and what you are doing in the bathroom is essential, especially when addressing the needs of those with mobility or stability issues. Make sure your bathtub or shower area is well light with an overhead waterproof lighting solution, which can be tied into your ceiling exhaust fan. Adequate lighting is necessary if you have a caregiver who will be assisting in the bathing process to be able to evaluate any changes in skin or body conditions and to make sure all bathing requirements have been met.
Light switches need to be accessible to both walking and those in wheelchairs. Light switches should be placed between 40 and 54 inches from the ground floor and preferably not directly above a counter. You should avoid using the older flip on and off switches for those with gripping problems. Instead use the toggle switches that can be used by hands or elbows. The best option might be a motion sensor lighting controls, but may be cost-prohibitive for some.
Bathing Enclosures
Additional consideration needs to be made for the type of enclosure you will use for your bathtub or shower. For those in wheelchairs and performing transports a non-rigid barrier should be used for ease of entering and exiting the bathing area. Most typical would be a shower curtain and/or liner.
Per the CDC (Centers for Disease Control) over 3,000 people over the age of 15 years of age are seen in the emergency room each year for shower enclosure related injuries. Most involve glass shower enclosures. (2) Injuries include people falling against the glass, breaking it and being cut by shards. Others may be hurt by stepping on the broken glass while exiting the bathing area. And others may have fallen against the glass and then backward into the tub or shower to receive their injuries.
Serious evaluation and planning should be given to the pending problems a glass enclosure may present versus using a shower curtain.

Bathroom Bathing Design: 10 Things to Consider-Part III Conclusion
We hope you have learned enough information to put together a list of addressable items either for a new bathroom build or a bathroom remodel. As you saw there are many areas of concerns to consider when putting each piece of the build together. The needs of one impaired person may be vastly different from another, such as someone in a wheelchair versus someone with some mobility or stability issues. Identify areas of accessibility concerns and design solutions that make bathing easier and safer for your loved one(s). Remember – slipping and tripping is not an option in your bathroom! Safety is paramount!
We would really like to hear your comments and design ideas you used to make your bathing experience safer and easier. Please leave your comments below.
To Your Improved Health, Independence and Quality of Life!
Please continue reading more in this series at:
- Bathroom Bathing Design: 10 Things to Consider-Part I
- Bathroom Bathing Design: 10 Things to Consider-Part II
- Bathroom Bathing Design: 10 Things to Consider-Part III
References:
- (1) Home Ventilation Institute – Bathroom Exhaust Fans
- (2) CDC – Morbidity and Mortality Weekly Report for June 10, 2011